How to use Tunes Cleaner for Mac
Useful Article
Step 1: Launch Imelfin Tunes Cleaner
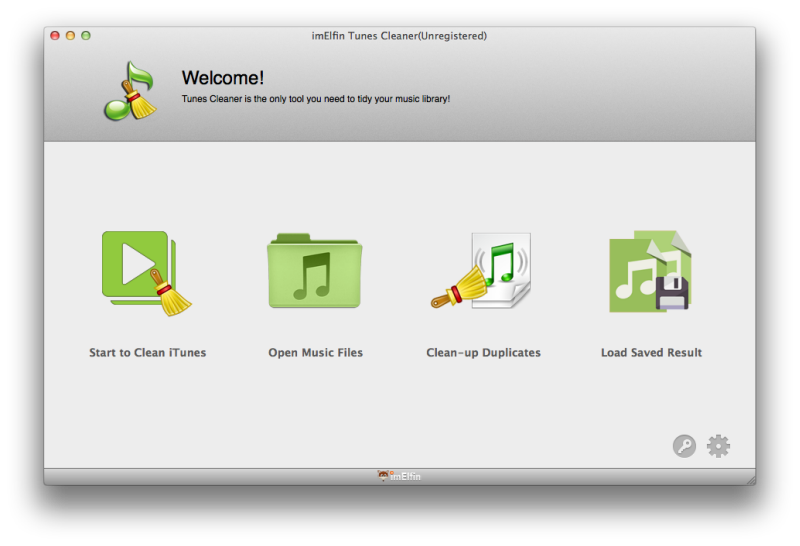
After you launch this iTunes cleanup program, you will see 4 different options: Start to Clean iTunes, Open Music Files, Clean-up Duplicates and Load Saved Result. Clicking “Start to Clean iTunes” would guide you to clean up and repair iTunes music library. The “Open Music Files” option would guide you to fix external music library, out of iTunes. To specially delete duplicate music files in iTunes or in other music folders on Mac, you can choose "Clean-up Duplicates" option. If you’ve saved unfixed music files in your last fixing with Imelfin Tunes Cleaner, you can click “Load Saved Result” to load the unfixed music files you saved for fixing.
Step 2: Scan iTunes music library
After you choose your way to clean up iTunes, open music files or load saved result, this iTunes cleaner would start to scan your iTunes or music folder, and then display the results in classified categories.
Step 3: Start to fix iTunes music library
The problematic songs are now listed in different categories. Click the “Fix All” button to fix all results or tick on every song for fixing.
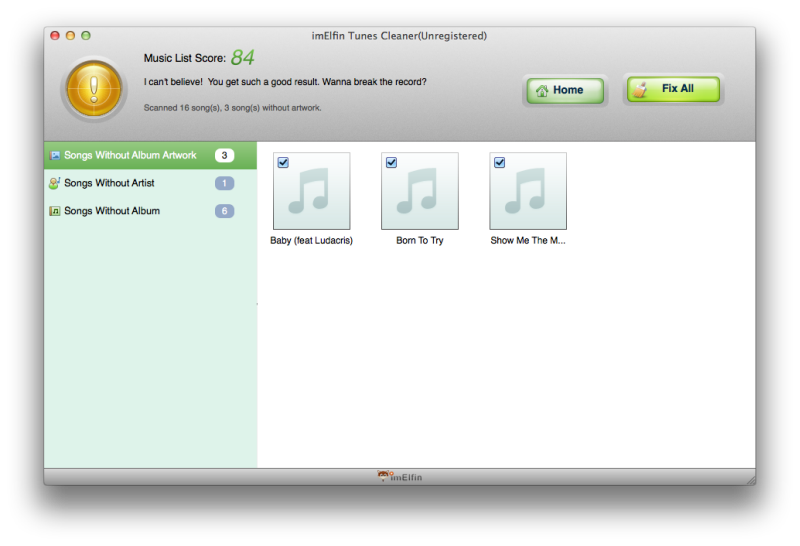
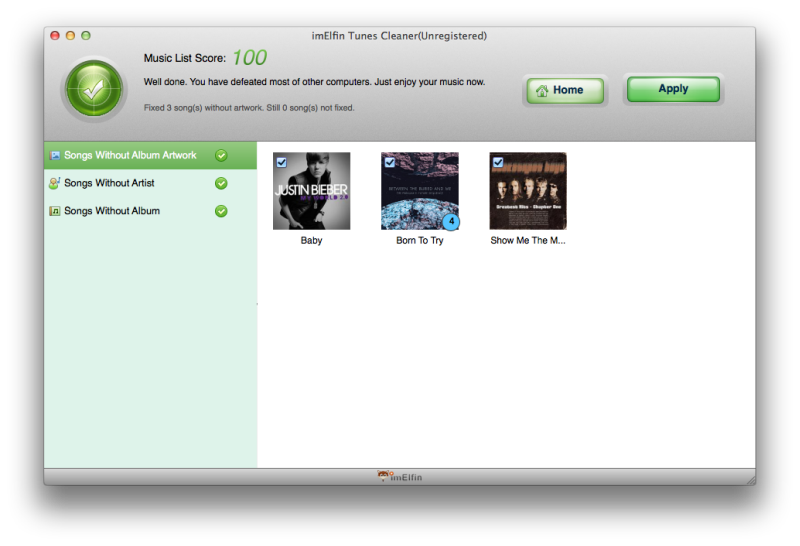
The incomplete album info, such as missing album cover and artwork, will be completed in the meantime.
Step 4: Apply fixed results
After all fixings done, you can click the “Apply” button to apply and save all fixed results.
Step 5: Clean up duplicates in iTunes on Mac
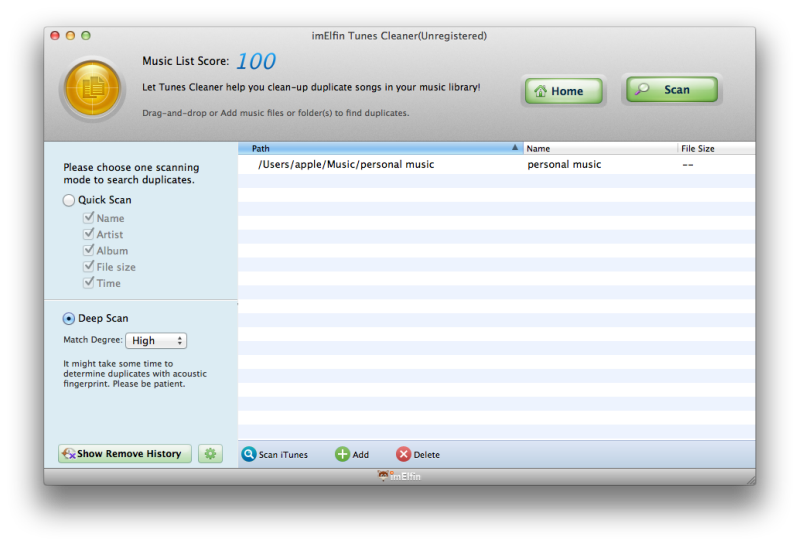
Under the "Clean-up" part, choose "Quick Scan" to find duplicates in a shorter time or "Deep Scan" (set the "Match Degree" as "High") to locate duplicate music files as many as possible. Click "Scan iTunes" button at the bottom to start iTunes duplicates scanning.
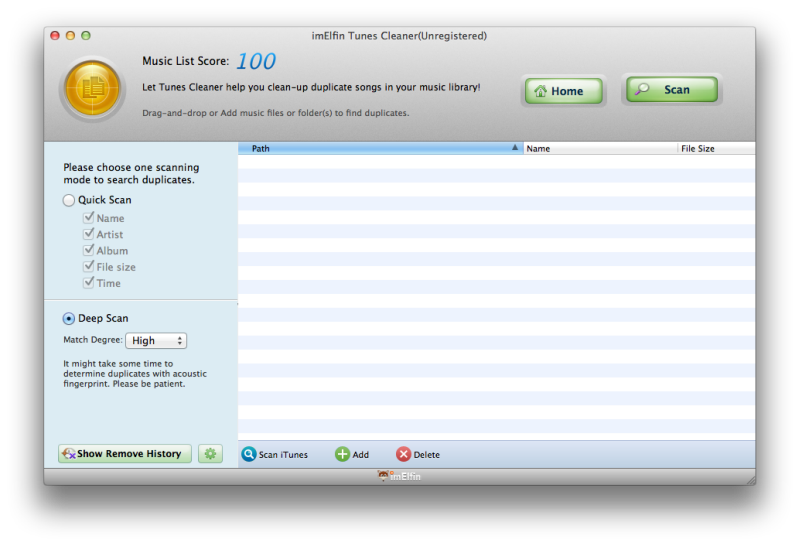
In seconds or minutes, you will find the duplicates music files displayed with redundant song files checked. Click "Remove" button, the selected duplicates will be removed from your iTunes music library quickly.
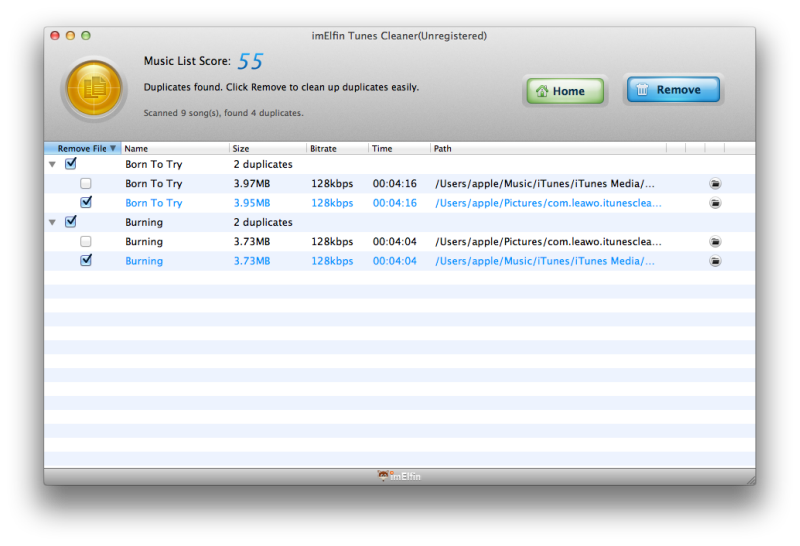
When clicking "Add" button on the bottom tool bar, you will be able to clean up duplicates from any music folders on your Mac. Once the music folders are added, they will be listed on the above path list. Click "Scan" button to find the duplicates under those paths.
Similarly, all duplicates files will be found very fast. Click "Remove", the duplicates will be auto deleted from your music libraries on Mac.

Note that "Apply" and "Remove" features only apply to registered version.

