How to use Blu-ray Creator for Mac
Useful Article
Part 2: How to edit your Blu-ray movies
Part 1: How to burn Blu-ray
Blu-ray Creator for Mac is an ideal Blu-ray Burning Tool for Mac users to burn all formats of the downloaded or self-made videos, movies and slideshows into Blu-ray disc, DVD Folder, ISO or even dvdmedia. This step-by-step guide will show you how to use Imelfin DVD creator for Mac to burn all sorts of videos or movies to Blu-ray disc on Mac OS X (Leopard and Snow Leopard).
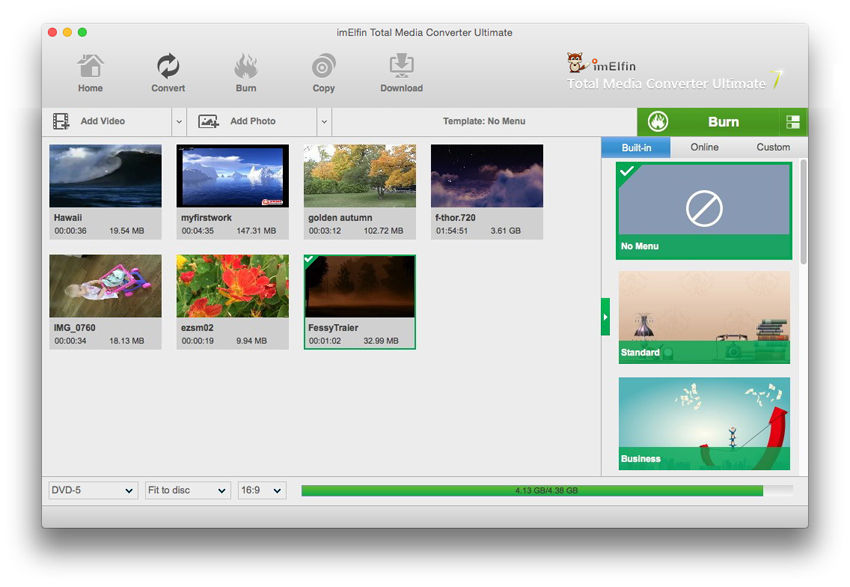
Step 1: Add videos and photos
Drag and drop the files you want to burn directly into the program, or just load them from the iMovie, iPhone, iTunes, etc. on the right Media Bower. All loaded files will be shown in thumbnail in the file list. You can merge, split or rearrange them by dragging and dropping the thumbnail freely according to your preferences.
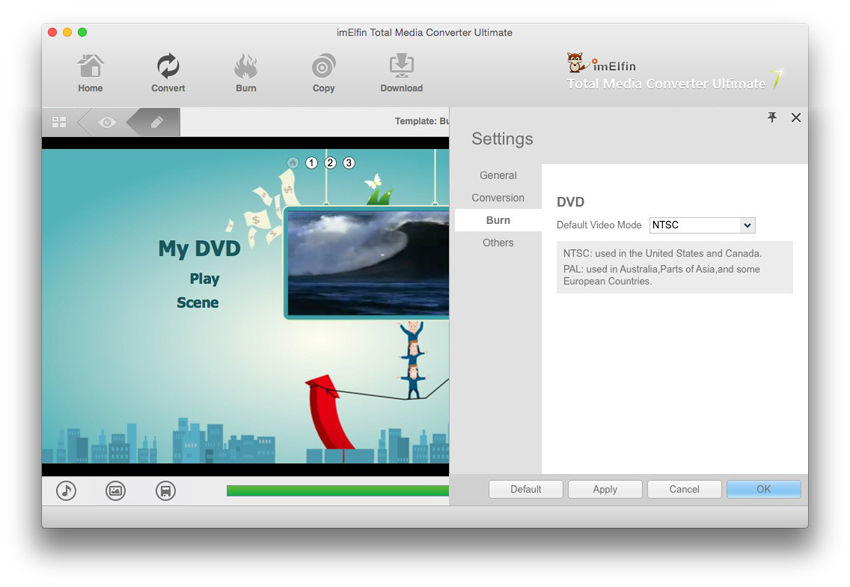
Step 2: Complete Burning Settings task
Open the panel of ImElfin Blu-ray Creator and click on the "Preference" button (or make use of shortcuts “command+,”) to open the program settings:
"General": Click to choose program interface language;
"Conversion": Priority native code;
"Burn": Choose default video mode from NTSC and PAL;
"Others": Add external subtitle, choose encoding, choose location and format for thumbnail (screenshot);
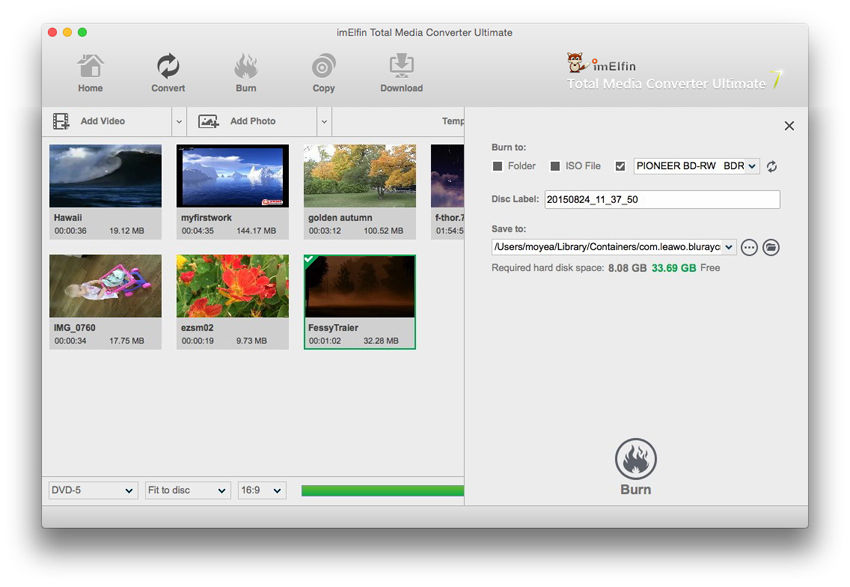
Step 4: Start burning
After the necessary DVD or BD burning setting, click the big green “Burn” button. On the popup sidebar, set “Burn to”, “Disc Label” and “Save to” option. (Note: to burn video to Blu-ray/DVD disc, insert a blank disc into the recorder drive, set disc type and then choose recorder drive as output target in “Burn to” option, which allows multiple choices.) Click on the "Burn" button at the bottom of the sidebar to start burning video to DVD/Blu-ray.When everything is ready, click "Burn" to choose the output file format and location. After all things have done, press "Start" and it will start burning Blu-ray disks for you.
Part 2: How to edit your Blu-ray movies
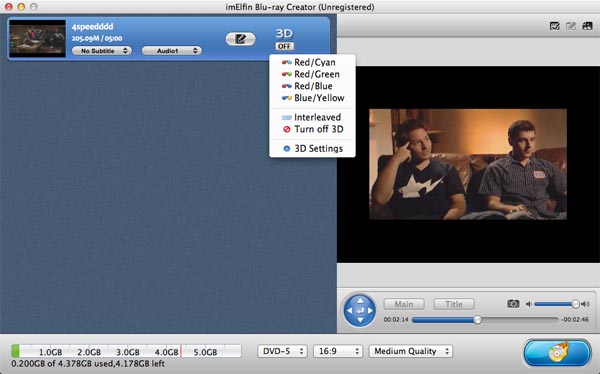
Step 1: Convert 2D to 3D
Blu-ray Creator supports to convert and burn plain 2D video to 3D with 6 different 3D effects: Red/Cyan, Red/Blue, Red/Green, Blue/Yellow, Interleaved, Side by Side. You can set it as you like.
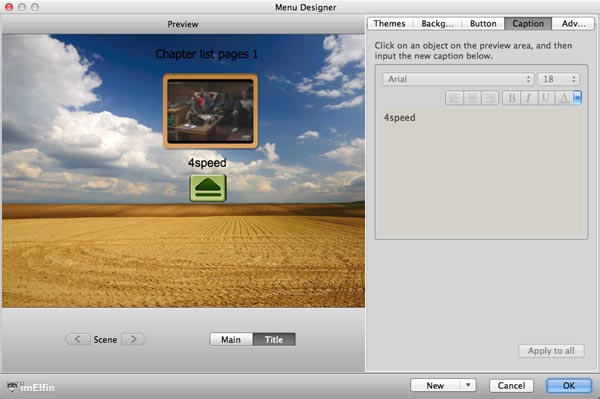
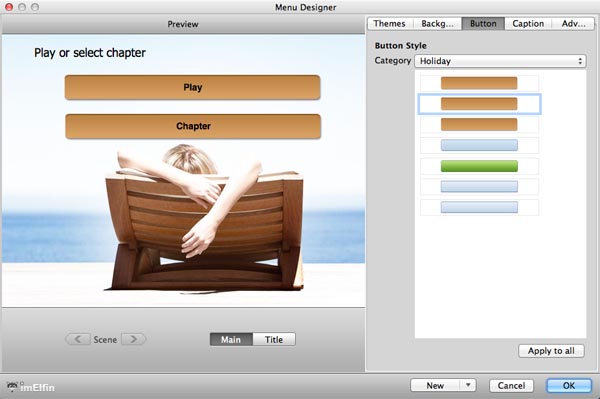
Step 2: Customize Blu-ray disks menu (optional)
Click the "Design Menu" button on the lower right bottom of the main interface to enter the menu Designer window. You can customize the themes, the play button,the background picture ,the caption and the number of chapters etc of the Blu-ray disks menu. You can freely decorate your Blu-ray disks menu with your own files from iPhoto or iTunes.
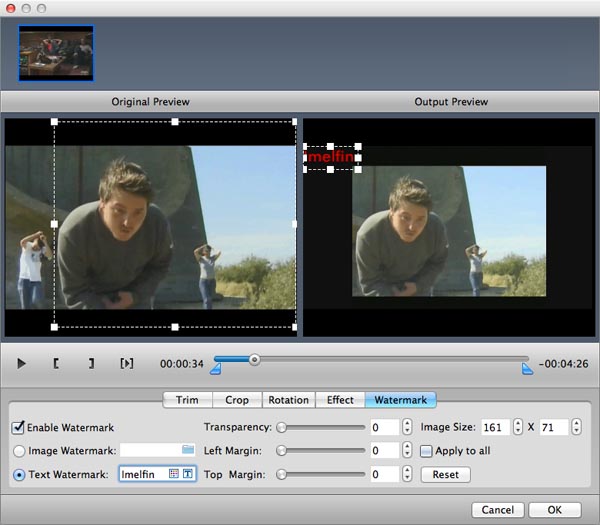
Step 3: Edit your Blu-ray movies
To start edit your photos or videos, just click the edit button, now you can crop, trim, add watermarks, insert subtitles or adjust video effects and more to personalize your Blu-ray disks.